Cozy Homemade Banana Pudding
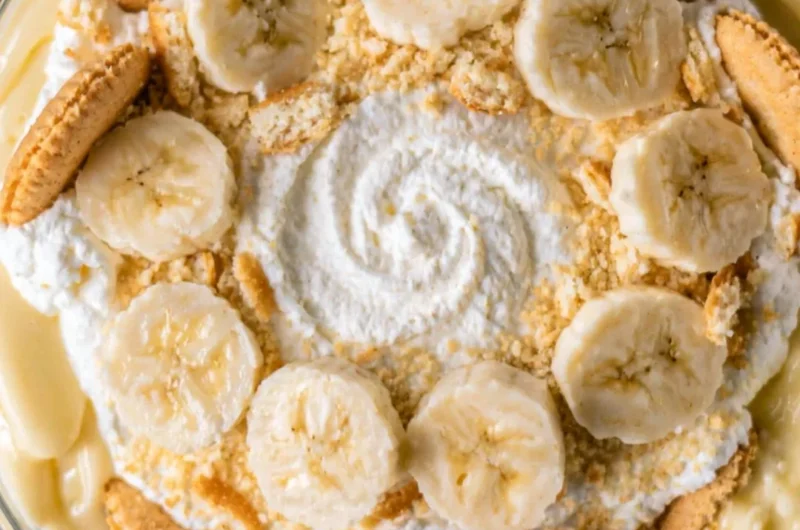
Is there anything more comforting than a bowl of homemade banana pudding? With its creamy texture, sweet banana slices, and the delightful crunch of vanilla wafers, this dish is pure nostalgia for many of us. My childhood afternoons often revolved around gathering with family in my grandmother’s warm kitchen, where the hum of a gentle summer breeze mingled with the sweet aromas wafting from the oven. She would serve her famous banana pudding, and every spoonful was a little bite of sunshine. Perfect for any occasion, especially as a creamy fall dessert, this is one recipe you’ll definitely want to pin for later!
Why You’ll Love This Recipe
- Quick & Easy: This no-bake dessert comes together in minutes, making it a perfect choice for any last-minute gatherings.
- Crowd-Pleasing: Who doesn’t love the combination of bananas and creamy pudding? It’s a hit with both kids and adults alike!
- Family-Friendly: Simple enough for the little ones to help, making it a perfect activity for family bonding.
- Versatile: You can dress it up or down and customize it to suit your taste—add layers of your favorite candies or a zesty twist of citrus!
- Make-Ahead: You can prepare this comforting dish ahead of time, giving the flavors a chance to meld beautifully in the refrigerator.
What You’ll Need
Gather These Simple Ingredients:
- 3 ripe bananas
- 1 package (3.4 oz) instant vanilla pudding mix
- 2 cups cold milk
- 1 teaspoon vanilla extract
- 1 container (8 oz) whipped topping
- 1 box vanilla wafers
How to Make Cozy Homemade Banana Pudding
Let’s make it together! Follow these warm and inviting steps to create your own comforting dish.
- In a large bowl, whisk together the instant pudding mix, cold milk, and vanilla extract until smooth and creamy.
- Gently fold in the whipped topping until well combined, taking care not to deflate it too much.
- In a 9×13 inch dish, layer half of the vanilla wafers, ensuring a nice even spread.
- Follow this with half of the sliced bananas, gently laying them over the wafers.
- Spoon half of the pudding mixture over the bananas, spreading it out evenly.
- Repeat the layers with the remaining ingredients: vanilla wafers, sliced bananas, and finish with the last of the pudding mix on top.
- Cover the dish with plastic wrap and refrigerate for at least 4 hours, or for the best flavor, let it sit overnight before serving.
Variations & Creative Twists
Looking to jazz up your banana pudding? Here are some fun ways to customize it:
- Chocolate Delight: Mix in chocolate pudding instead of vanilla for a rich and indulgent chocolate-banana layer.
- Nutty Crunch: Add chopped nuts like walnuts or pecans between layers for a delightful crunchy texture.
- Creamy Citrus Twist: Fold in the zest of an orange or lemon for a zesty, refreshing kick that brightens this cozy classic.
- Berry Bliss: Swap some of the bananas for fresh berries like strawberries or blueberries for a burst of juicy flavor.
Chef Emma’s Helpful Tips
To ensure your banana pudding comes out perfectly every time, keep these tips in mind:
- Make-Ahead Advice: This dessert tastes even better after a night in the fridge, so don’t hesitate to make it a day in advance.
- Ingredient Swaps: If you’re short on bananas, feel free to add other fruits like peaches or mangoes for a unique spin.
- Slicing Tricks: To keep your bananas from browning, add a squeeze of lemon juice over them right after slicing.
- Storage Suggestions: To store leftovers, cover the dish tightly to prevent drying out. Consume within 3 days for the best taste and texture.
Nutrition Information per Serving
- Serving Size: 1/10 of the recipe
- Calories: 210
- Carbohydrates: 29g
- Sugar: 12g
- Fat: 9g
- Protein: 2g
- Sodium: 150mg
Frequently Asked Questions
Can I make this ahead?
Absolutely! This banana pudding tastes best when made ahead of time, allowing the flavors to meld together.
Can I use different ingredients?
Certainly! Feel free to mix it up with your favorite flavors or fruits.
How do I store leftovers?
Store it in the refrigerator in a tightly sealed container. Enjoy within 3 days for the freshest taste!
How long does it last?
Best consumed within 3 days, although the pudding may start to lose its texture after that.
Final Thoughts
There’s something magical about Cozy Homemade Banana Pudding that brings back fond memories and creates new ones. Whether you’re whipping it up for a family gathering or simply indulging in a cozy evening treat, this recipe is sure to warm your heart and satisfy your sweet tooth.
Save this Cozy Homemade Banana Pudding to your "Desserts to Savor" board so it’s ready when you need a delightful, comforting dessert! Happy cooking!

Cozy Homemade Banana Pudding
- Total Time: 240 minutes
- Yield: 10 servings 1x
- Diet: Vegetarian
Description
A comforting no-bake banana pudding that layers creamy pudding, ripe bananas, and crunchy vanilla wafers.
Ingredients
- 3 ripe bananas
- 1 package (3.4 oz) instant vanilla pudding mix
- 2 cups cold milk
- 1 teaspoon vanilla extract
- 1 container (8 oz) whipped topping
- 1 box vanilla wafers
Instructions
- Whisk together the instant pudding mix, cold milk, and vanilla extract until smooth and creamy.
- Fold in the whipped topping until well combined.
- Layer half of the vanilla wafers in a 9×13 inch dish.
- Lay half of the sliced bananas over the wafers.
- Spoon half of the pudding mixture over the bananas, spreading it evenly.
- Repeat the layers with the remaining ingredients, finishing with pudding on top.
- Cover the dish with plastic wrap and refrigerate for at least 240 minutes, or overnight for best flavor.
Notes
For a unique twist, try swapping in chocolate pudding, adding nuts, or incorporating fresh berries.
- Prep Time: 15 minutes
- Cook Time: 0 minutes
- Category: Dessert
- Method: No-Bake
- Cuisine: American
Nutrition
- Serving Size: 1 serving
- Calories: 210
- Sugar: 12g
- Sodium: 150mg
- Fat: 9g
- Saturated Fat: 3g
- Unsaturated Fat: 6g
- Trans Fat: 0g
- Carbohydrates: 29g
- Fiber: 1g
- Protein: 2g
- Cholesterol: 5mg